• Welcome to this website/forum for people interested in the Morgan 38 Sailboat. Many of our members are 'owners' of Morgan 38s, but you don't need to be an owner to Register/Join.

Spring Project

jimcleary

James M. Cleary
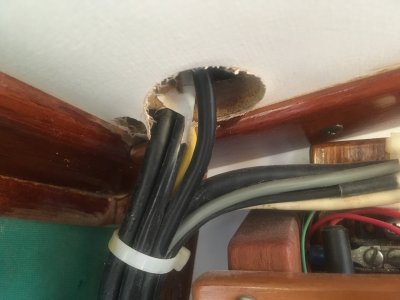
My spring project was to redo the aft bulkhead in the cabin. The previous owner had the instruments on the cabin bulkhead in the cockpit. They were always a pain because we had to ask people to move so we could see the gauges. When we went to a new instrument package, it was installed over the companionway. The aft bulkhead in the cabin was now marred by the remaining holes. As a temp fix I covered them with scrap pieces of formica just screwed in place. This year the job is permanently completed.

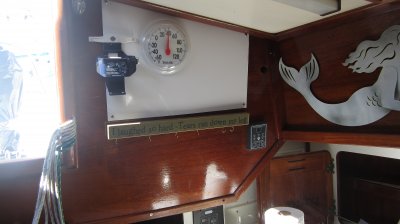
Photo 1 - Port side (galley) with the temp patch.

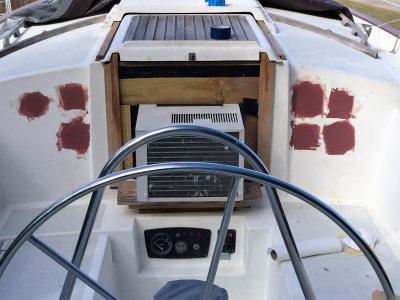
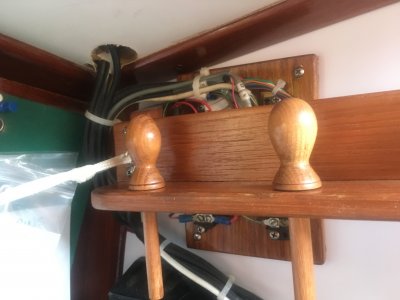
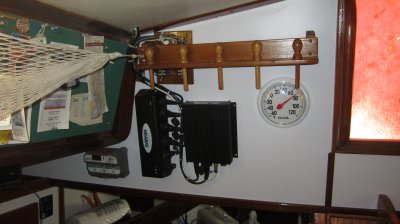
Photo 2 - Stbd side with temp patch.

Photo 3 - Port side plugged and sanded.

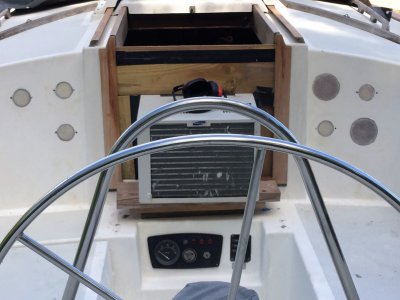
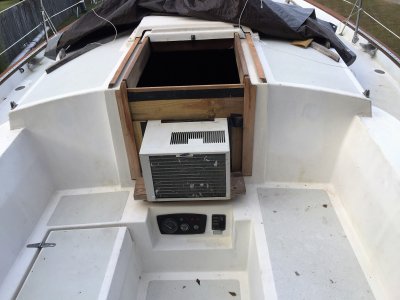
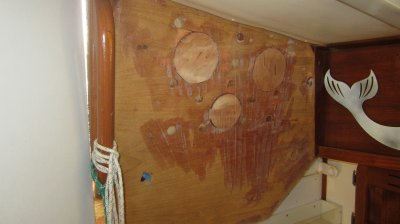
Photo 4 - Stbd side plugged and ready to be sanded.

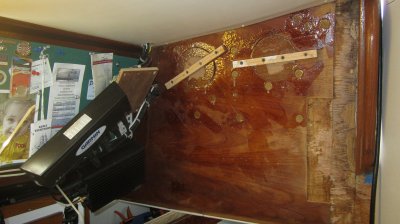
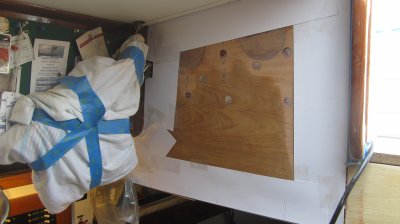
Photo 6 - Oaktag pattern being created.

Photo 8 - Formica glued in place on port side.

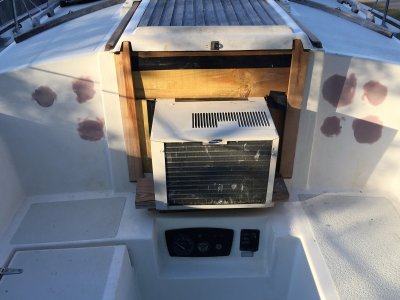
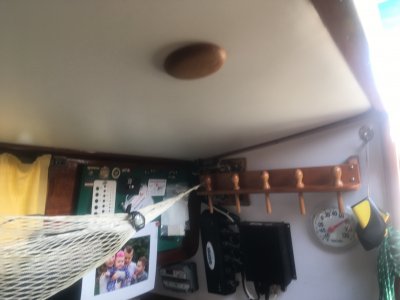
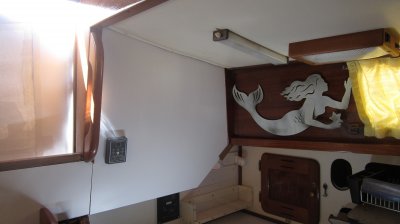
Photo 9 - Stbd side complete with new mouldings.

Photo 10 - Port side complete with new mouldings.

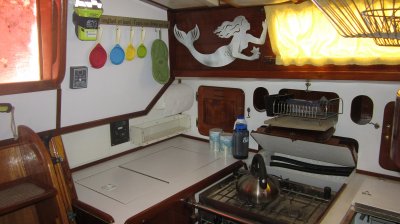
Photo 12 - Galley's new look with fewer teak bulkhead faces.

Jim
 

Attachments

  • 17-019 Dana - Aft Bulkhead 171703-1.jpg
    17-019 Dana - Aft Bulkhead 171703-1.jpg
    2.3 MB · Views: 158
  • 17-019 Dana - Aft Bulkhead 171703-2.jpg
    17-019 Dana - Aft Bulkhead 171703-2.jpg
    2.5 MB · Views: 151
  • 17-019 Dana - Aft Bulkhead 171703-3.jpg
    17-019 Dana - Aft Bulkhead 171703-3.jpg
    2.8 MB · Views: 151
  • 17-019 Dana - Aft Bulkhead 171703-4.jpg
    17-019 Dana - Aft Bulkhead 171703-4.jpg
    3.2 MB · Views: 149
  • 17-019 Dana - Aft Bulkhead 171703-6.jpg
    17-019 Dana - Aft Bulkhead 171703-6.jpg
    2.5 MB · Views: 150
  • 17-019 Dana - Aft Bulkhead 171703-8.jpg
    17-019 Dana - Aft Bulkhead 171703-8.jpg
    2.4 MB · Views: 157
  • 17-019 Dana - Aft Bulkhead 171703-9.jpg
    17-019 Dana - Aft Bulkhead 171703-9.jpg
    2.9 MB · Views: 149
  • 17-019 Dana - Aft Bulkhead 171703-10.jpg
    17-019 Dana - Aft Bulkhead 171703-10.jpg
    2.8 MB · Views: 153
  • 17-019 Dana - Aft Bulkhead 171703-12.jpg
    17-019 Dana - Aft Bulkhead 171703-12.jpg
    3 MB · Views: 153
Great job Jim. I also had bulkhead instrument holes with analog gauges that no longer worked or was redundant to my GPS I will be installing. I patched them with glass, sanded and re-filled, and sanded etc until it was ready to apply finish. Here are a few pictures of my repairs. The last picture shows two coats of Gelcoat and you can still see the underlying patch work but after another two coats spraying more gelcoat, it really worked out well. I plan to follow with light compounding and then buff out with polish to finish project. I have already posted pictures of the inside.
 

Attachments

  • IMG_1593.JPG
    IMG_1593.JPG
    905.1 KB · Views: 157
  • IMG_1597.JPG
    IMG_1597.JPG
    1 MB · Views: 148
  • IMG_1598.JPG
    IMG_1598.JPG
    1.5 MB · Views: 142
  • IMG_1605.JPG
    IMG_1605.JPG
    1.4 MB · Views: 122
John

The work on the cockpit side of your bulkhead looks great. I don't have any talent with finishing fiberglass and gel coating. Where do you find sprayable gel coat? I've used brushable gel coat, but that is difficult to smooth into a finished product. I do have another question for you. How do you get into the boat with the A/C there???

Jim
 
Thanks Jim. The boat is still on stands during my refit. So, not sailing her yet. I am getting very limber jumping in and out of my boat with the air conditioner in the way and I must say, it's either going to kill me or help condition me in the end, I'm not sure which at this point. But I must have it with our summers in Ms if any work is done inside the boat. I've had her on stands for one and half years now and project it will be done by the end of the year or early next year. I work on it on the weekends and is my therapy away from my regular job.

I used westmarine 2 part finishing gelcoat once I finally got a smooth surface after a lot of sanding and refilling and sanding. I also sanded after each spraying of gelcoat and have 4 thin coats and will finish the bulkhead soon after I grind out the small crack on the transom that seems to be a characteristic of this model boat over time. So while I have the set up to spray out the transom, I will finish with the bulkhead. The crack in the gelcoat is not as bad as some of the pictures I've seen on this web site, but it's noticeable and will require a lot of prep work to get right. I purchased an inexpensive sprayer from harbor freight and with an air compressor, the sprayer lays down even thin coats. The little spray really impressed me. I will post pictures of my before and after fix of the crack in the transom.
 
John

After trying to fix the transom crack a couple of times without success, we had a good yard do it correctly in 2010 when we had Dana completely repainted. They ground the crack down substantially, then built it back up with cloth & glass. Seven years later it has not reappeared.

That finishing gelcoat is thin enough to work in a sprayer? I'm impressed.

Jim
 
Yes, it is thin enough to spray. by the way, I will be laying some glass fiber matting to fix the crack in the gelcoat on the transom. a crack will reappear without laying down fiber.
 
John

Sounds like you know what you are doing with the glass repairs. I wish I had that ability.

Jim
 
We dug out the cracks in Paragon's transom, filled them with, then had a guy spray the transom with gelcoat - looked good but over time cracks re-appeared and thin layer of gelcoat not looking as good. The repair Jim described sounds more comprehensive.
 
Alan

We did the filler repairs twice before we learned our lesson and had the job done correctly by someone who knew how it had to be done.

Jim
 
Hi Jim, You mentioned installing the instruments over the companionway. Do you have any photos of the install? We are looking to do the same on our 384.
Thanks,
J
 
Jason

I'm heading out to the boat now. I'll take photos and post them for you when we get back on Thursday.

Jim
 
Jim, off topic: when you had Dana painted, did they remove the stanchion bases from the bulwark? I am about to have that job done and am worried about getting under there to the nuts, which are impossible to grip with a wrench because of the caulking Morgan used.
 
Jason
I am up loading a number of photos of the instrument pod over the companionway. I apologise for the quality of the photos, they were taken with the phone. Photos 1 & 3 show the stbd side inside the cabin where the cables that feed the instruments pass thru the headliner. The chart plotter, radar, and autopilot wires go up thru the cabin top using clam type waterproof fittings visible in photo 7. The NEMA 2000 cable for the B&G instruments run under the headliner to a spot where photo 2 shows a wooden plug. Above that wooden plug the cable passes thru the cabin top and is lead to the pod via a piece "seal tight" flexible plastic conduit, (photos 6&9). The pod over the companionway hood is bolted to the hood with two 1/4" SS bolts. The worst part of that job was getting fingers up under the hood to catch the washers and nuts. Photos 4 & 5 show the pod in place. Photo 7 shows the chart plotter and the auto pilot controller mounted on a starboard shelf under the dodger. Photo 8 shows the view of all the instruments.

The thing that we like about having the sailing meters over the companionway is that they are always in our view as we are looking outside the boat. The chart plotter and autopilot control on the cabin top are under the dodger so we have them in front of us as we huddle in the shelter of the dodger. Except for when we are doing close in maneuvering, we are almost never piloting from behind the wheel.

If any of this is unclear just ask away. I'm at: saildana382@msn.com.

Terry
When we had Dana painted in 2010, it was from the gunnel down. To have removed the hardware on deck, repaired the dings and cracks, and painted, the cost would have been astronomical. At the time we couldn't justify the expense. I have rebedded one of the stanchion bases on the port side when I had the galley furniture out. I remember using a vice grip to grab the nuts with all the caulking around them and having Bonnie turn the bolts free from on deck. Not an easy job for either of us.

Jim
 

Attachments

  • Dana Inst 1.JPG
    Dana Inst 1.JPG
    1.5 MB · Views: 62
  • Dana Inst 2.JPG
    Dana Inst 2.JPG
    1.6 MB · Views: 68
  • Dana Inst 3.JPG
    Dana Inst 3.JPG
    1.9 MB · Views: 60
  • Dana Inst 4.JPG
    Dana Inst 4.JPG
    1.7 MB · Views: 63
  • Dana Inst 5.JPG
    Dana Inst 5.JPG
    2 MB · Views: 61
  • Dana Inst 6.JPG
    Dana Inst 6.JPG
    2.2 MB · Views: 59
  • Dana Inst 7.JPG
    Dana Inst 7.JPG
    1.8 MB · Views: 61
  • Dana Inst 8.JPG
    Dana Inst 8.JPG
    1.8 MB · Views: 59
  • Dana Inst 9.JPG
    Dana Inst 9.JPG
    1.5 MB · Views: 54
Thank you Jim! This is very helpful. We have a 384, thus the traveler is up on the deck. I just need to figure how to reroute the traveler control lines for access aft of the installed instrument pod. I agree, the location will be an improvement, as everyone can see the information, not just the person at helm if mounted on the pedestal.

With regards to the lifeline stanchions...we had to reinstall all of ours due to Irma damage. Didn't encounter over caulking, but certainly removing and reinstalling the thrubolts was a pain. In hard to reach areas, I used an open wrench on the nut, but was sure to tie a string on the closed end in case it was dropped. On the reinstall, we used a little dab of butly rubber to keep the flat and lock washers from sliding down before starting the nut by hand, then finishing by wrench (separate set of hands are required to secure on top side). If you have any questions about specific locations or access, we went through all of them...
 
Jason, what did you do to get to the stanchion base that is hidden behind the head internal molding? If you cut a hole, where? thanks.
 
Hi Terry,
After removing select headliners and wall paneling, we were able to access most thrubolts of the stanchion bases. The two we had to cut access holes for, were the port stanchion adjacent to galley, and the port stanchion next to head. For the galley, we measured location of base in reference to object that could be transferred from external to internal, then cut out square in back of cabinet to access. Then just remounted the cutout after access was obtained. For the head, we did same, but had to cut out a square in the top fiberglass layer inside the cabinet to access. This fiberglass and plywood was fairly thick (~1"). Then we covered up with a 'plastic' plate cover - it's in the ceiling of the cabinet and thus not really visible. Let me know if you have questions on specific stanchion bases and I can let you know how we approached. Most were single hand access in akward positions, which made it tedious to both remove the existing bolts/nuts and install new ones.
Cheers,
J
 
Back
Top