• Welcome to this website/forum for people interested in the Morgan 38 Sailboat. Many of our members are 'owners' of Morgan 38s, but you don't need to be an owner to Register/Join.

Rudder Gland Wrench

jimcleary

James M. Cleary
After years of wrestling with the rudder gland nut, I got tired of hanging upside down trying to get a chain wrench to work. Then comes along Jeff Lovett with a very simple idea. A $10 piece of 3/8" x 7" x 12" scrap steel. Three hours of work with a sawzall and a grinder. A little spray paint and the job becomes easy. Of course I still have to hang upside down. Thank you Jeff.

Jim
 

Attachments

  • 16-068 Dana Wrench 162311-1.jpg
    16-068 Dana Wrench 162311-1.jpg
    3 MB · Views: 161
  • 16-068 Dana Wrench 162311-2.jpg
    16-068 Dana Wrench 162311-2.jpg
    3 MB · Views: 169
Jim, if I could trouble you to put dimensions on that?? I'd like to make the same tool as I have that repacking/tightening job in my future!
 
John
The nut is 3 1/4" across the faces. Started with a 7" x 12" x 3/8" piece of steel. Used the nut itself to outline the opening. Left 1" on either side of the opening. Tapered down to a 2" wide handle. Drilled with a 1/4" bit at the three corners of the opening to get then in the right locations. Used a sawzall to cut and a bench grinder to shape and smooth the corners.

Jim
 
For the amount of labor involved, you couldn't charge enough to realize the cost of a chute. Besides, once you started making them as a business, someone in China would steal the idea and make them cheaper. Why bother?

Jim
 
For the amount of labor involved, you couldn't charge enough to realize the cost of a chute. Besides, once you started making them as a business, someone in China would steal the idea and make them cheaper. Why bother?

Jim
Probably true
 
John Harrison is a good friend of mine Hes a banker , always looking for a angle to make money So i was just teasing him with wrench production. ! LOL
 
Jeff
Your design. I just came at from a different way. And a different color. One question? In that last photo, where is your steering gear? Dana has an aluminum platform that extends over the torpedo tube piping that guides the quadrant. Yours looks much different. Thanks again for the idea.

Jim
 
Jeff
Thinking more about the wrenches, I've come to the conclusion that your design is the better of the two. With mine the wrench will not stay positioned on the nut without a hand holding it there. With your design, the side opening will allow the wrench to lock onto the nut without being held. That is very important considering the position a person is in when using the damned thing.

Jim

Any such design benefit is merely by chance. I can see what you mean. Good to know.
 
Jeff
Your design. I just came at from a different way. And a different color. One question? In that last photo, where is your steering gear? Dana has an aluminum platform that extends over the torpedo tube piping that guides the quadrant. Yours looks much different. Thanks again for the idea.

Jim

Jim, I stripped everything out to facilitate other projects in the area (tabbing between the aft bulkhead/divider and the deck, replacing the torpedo tube, installing an autopilot, and painting the interior). That said I would like to see a picture of the aluminum platform you mention. I did not remove anything I would consider an "aluminum platform".
 
Jeff
I'll take photos when I get it back together. The stop on the aluminum frame prevented the quadrant from being totally removed so I could work on the packing gland. So like you I had to disassemble the thing. Like any boat project you have to take three things apart to work on one simple job. And you have to use all the tools you have and always have to go out and buy or make more.

Jim
 
Jeff
It finally stopped raining here so I was able to get out to the boat to reinstall the rudder packing and to put the steering back together. Last weekend the hull at the rudder post was given a coat of Bilgecoat.

Photo 1 - Ready to put back together.

Photo 2 - The Aluminum Platform without the quadrant. The vertical post in the center is the quadrant stop. Dana came with the Orion Steering
system. Somewhere along the line Morgan switched to other systems.

Photo 3 - The packing gland nut being tightened with the new wrench. Definitely needed two hands to do the job. All the time hanging upside
down.

Photo 4 - The nut in place. The wrapped up thing is the rudder position indicator for the autopilot.

Photo 5 - The quadrant back on the rudder shaft.

Photo 6 - The Aluminum platform with the quadrant in place and the cables on.

Photo 7 - The quadrant reinstalled.

Photo 8 - The tiller arm for the autopilot.

Photo 9 - The Jeffa electric autopilot. It's mounted upside down. That's the only way It would fit in the space.

Photo 10 - The cover on and the job is done. The only thing to do is to check the packing when the boat get back in the water.
 

Attachments

  • 16-070 Dana Steering 160112-1.jpg
    16-070 Dana Steering 160112-1.jpg
    2.7 MB · Views: 150
  • 16-070 Dana Steering 160112-2.jpg
    16-070 Dana Steering 160112-2.jpg
    2.7 MB · Views: 161
  • 16-070 Dana Steering 160112-5.jpg
    16-070 Dana Steering 160112-5.jpg
    2.6 MB · Views: 149
  • 16-070 Dana Steering 160112-8.jpg
    16-070 Dana Steering 160112-8.jpg
    2.7 MB · Views: 159
  • 16-070 Dana Steering 160112-9.jpg
    16-070 Dana Steering 160112-9.jpg
    2.8 MB · Views: 153
  • 16-070 Dana Steering 160112-10.jpg
    16-070 Dana Steering 160112-10.jpg
    3.2 MB · Views: 147
  • 16-070 Dana Steering 160112-11.jpg
    16-070 Dana Steering 160112-11.jpg
    3.1 MB · Views: 139
  • 16-070 Dana Steering 160112-12.jpg
    16-070 Dana Steering 160112-12.jpg
    2.9 MB · Views: 140
  • 16-070 Dana Steering 160112-14.jpg
    16-070 Dana Steering 160112-14.jpg
    3 MB · Views: 133
  • 16-070 Dana Steering 160112-15.jpg
    16-070 Dana Steering 160112-15.jpg
    2.6 MB · Views: 129
One other thing... To shape and install the rings of 7/16" packing, I use a wood mandrel, 1 3/4" diameter, so the nut can be packed away from the shaft then slipped over the shaft. Easy!!

Jim
 

Attachments

  • 16-070 Dana Steering 160112-4.jpg
    16-070 Dana Steering 160112-4.jpg
    2.8 MB · Views: 136
Hey Jim
I think I just found another place to lighten the boat! Aluminum instead of that massive wood piece
 
Jim, What model 38X is Dana? hull number? It looks to me like the primary purpose of the aluminum bracket is to serve as a rudder stop. Clever design. I have not seen a similar system in other 38X images. Have you seen similar systems in other Morgan 38X?

Here is an image of Pilgrim's steering as I purchased it...


The 2X4 wooden posts on either side of serve as both supports for cockpit and as rudder stops. Note the repair to the port side post (right in image above) appears to have been cracked and repaired. My guess the damage was done when the rudder when hard over.

Here is an image after I removed everything but the packing nut and post.


More images of the quadrant are in my Steering & Autopilot Album on this site. I'm stalled on this project until I re-build the torpedo tubes. Plan to remove the old PVC pipe and replace it with fiberglass tubing.... some day.
 
I have a similar Orion steering setup on my 78 382 hull 49. Pic is when we first got it. Haven't gotten in there since. Looking at Jim's makes me feel the need to do some cleaning and painting!
 

Attachments

  • IMG_2853.JPG
    IMG_2853.JPG
    273.8 KB · Views: 94
Jeff
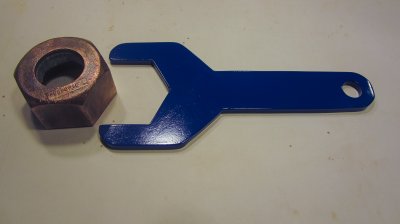
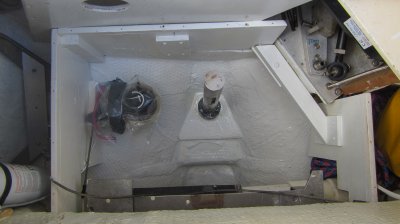
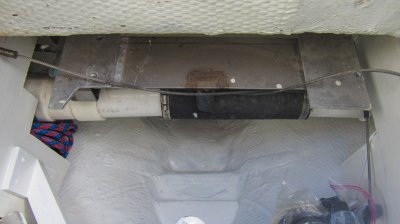
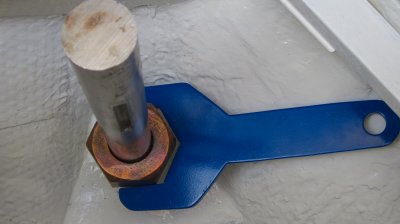
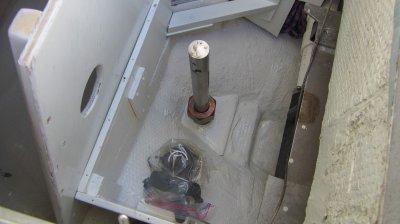
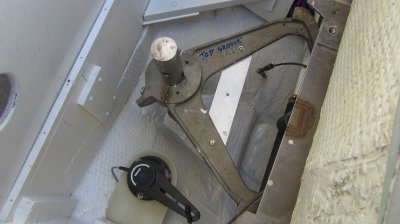
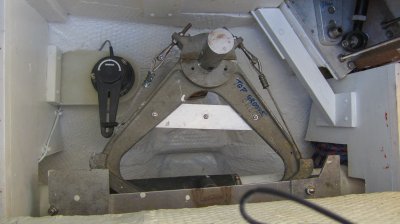
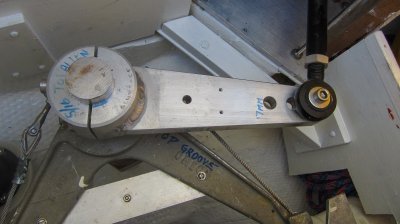
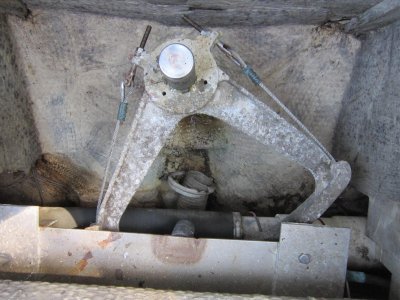
Dana is a 1978 382, hull #53. I'm not sure when the changes were made but, like Capt Pete's, the earlier boats had the Orion steering systems. The aluminum platform, in addition to supporting the rudder stop, support the cables from the pedestal on the port side and the turning block for the port wire on the stbd side. In the 29 years we've owned the boat, this is the first time I have done anything to the set up except for routine maintenance. The Orion company is long since out of business. The people at Edson tell me that if parts are needed, their stuff will fit. With the open design of the quadrant the stuffing box can be adjusted without having to remove the quadrant. I do like the support you have with those 2 x 4 posts.
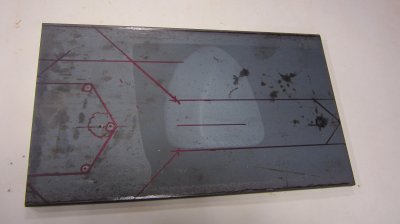
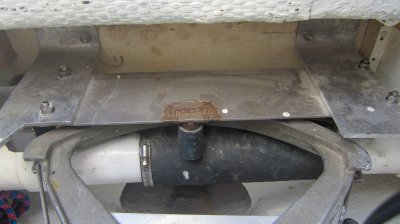
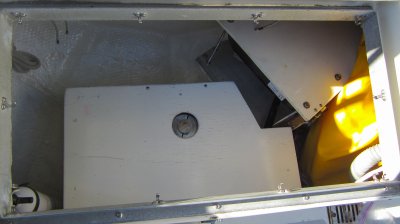
I have given a lot of thought to redoing the torpedo tubes. But that would be a nasty job and since they haven't leaked in the boats 39 years, I think I'll let sleeping dogs lie. Besides, I kind of enjoy when people come over to ask me "what are those holes in your boat".

Jim
 
Thanks for all the info.

Inspecting the old caulk / 5200? around Pilgrim's tubes makes me very suspect they will leak. Seems like now, while all the steering equipment is removed, is the time to overhaul the drains. This is also the logic / approach that still has me on the hard, almost 3 years into a refit. Sigh....
 
Jeff
I wonder if you are keeping track of the man hours related to your refit? Being part German in my ancestry, I am a bit anal with my record keeping (and other things). Years ago I kept track of the time spent on boat projects and the money spent on the boat. At some point the numbers in both category's scared the crap out of me. After that I quit the listings and am now blissfully ignorant of the numbers. I still faithfully keep a log book and record engine hours.

Jim
 
Jeff
I always thought that the torpedo tubes were bonded to the hull with a mish/mash of fiberglass with fillers. I would suspect that 5200 would not stand up to the years of the flexing of the hull and PVC pipe. Just my thoughts!

Jim
 
I am so glad Jeff has been doing his refit - I have learned so much about these boats and gotten terrific project ideas from his posts and pics on this site and on his site. I suspect he will have a boat that is better than new, good for decades of adventures, and better than most anything available without paying a king's ransom. So many thanks to Jeff and all the others who keep sharing their knowledge of these old girls!
 
Jeff
I always thought that the torpedo tubes were bonded to the hull with a mish/mash of fiberglass with fillers. I would suspect that 5200 would not stand up to the years of the flexing of the hull and PVC pipe. Just my thoughts!

Jim

Jim,

Pilgrim's (1979 M328 Hull#115) torpedo tubes are fastened / sealed to the hull via a heavy layer of white caulk like compound. The interior substance is different that that which is visible on the exterior around the tubes. I believe the substance visible from the exterior is 5200. I am uncertain what was used on the interior. It is quite flexible, but does not appear to be silicone based. I have picked and scraped away a good portion of the stuff on the port side and found no evidence of epoxy or filler. I have no idea if this assembly is original or the work of a previous owner.

Jeff
 
I am so glad Jeff has been doing his refit - I have learned so much about these boats and gotten terrific project ideas from his posts and pics on this site and on his site. I suspect he will have a boat that is better than new, good for decades of adventures, and better than most anything available without paying a king's ransom. So many thanks to Jeff and all the others who keep sharing their knowledge of these old girls!


Thank you. Have stalled out a bit over the past 6 months. My life outside of boats has been in a bit of turmoil. The clouds appear to be clearing and am looking forward to continuing my progress in earnest early next year.

Jeff
 
Jeff
Have you considered replacing the torpedo tube piping with a system with skin valves that can be shut in event of a piping failure? I've always thought that if we were going to do some extensive offshore work, I'd want to have the means to secure those holes in the boat.

Jim
 
What is a skin valve? I've looked at them and thought I could probably find a nerf style football to serve as an emergency plug for the tubes.
 
Jeff
I meant replacing the tube with thru hull fittings and Marlon valves. Probably in the 2" range, with the hoses being lead to the opposite sides of the cockpit drains. Again I only thought of this when we were seriously thinking about going offshore. Now that we have resigned ourselves to the occasional jump out side New Jersey and places like that, and only in fairly good weather, the idea has been put on the back shelf. I don't know what your plans are for the way you will use the boat, but it's something to think about.

Jim
 
Jeff
We also carry a couple of foam wedges that look like little traffic cones. They are for stuffing into a hole in the hull or a gushing thru hull. On the same line as your nerf football. We purchased them at Landfall Navigation for about 10 times the cost of your football. But they look cool.

Jim
 
Jim,

Pilgrim's (1979 M328 Hull#115) torpedo tubes are fastened / sealed to the hull via a heavy layer of white caulk like compound. The interior substance is different that that which is visible on the exterior around the tubes. I believe the substance visible from the exterior is 5200. I am uncertain what was used on the interior. It is quite flexible, but does not appear to be silicone based. I have picked and scraped away a good portion of the stuff on the port side and found no evidence of epoxy or filler. I have no idea if this assembly is original or the work of a previous owner.

Jeff

My torpedo tubes are fiberglassed to the hull on the inside. The exterior "seam" was filled with some type of caulk/adhesive - it was beginning to fail. I dug it out and sealed it with 4200 a few seasons ago. It's holding up fairly well.
 
I did the same thing...dug it out and resealed with 4200. I guess it could be done better.
With what...I don't know
 
My torpedo tubes are fiberglassed to the hull on the inside. The exterior "seam" was filled with some type of caulk/adhesive - it was beginning to fail. I dug it out and sealed it with 4200 a few seasons ago. It's holding up fairly well.

I have only taken a cursory look at the interior. From what I recall, it was a thick rubbery material. It seemed to be in fine condition and not showing any signs of a problem. Do you think the fiberglass is original? I have hull #256, so likely our boats should be nearly the same.
 
I like Jim Cleary's idea of closing off the tube and putting in 2" thru hulls above the waterline with cross tubing from the opposite side scuppers. I have already eliminated the deck scuppers from going to the tube and have thru hulls just below the scuppers.
If I ever start venturing offshore I may have to remove the tube entirely. For now, I'm a lake sailor and the tube doesn't concern me too much.
 
I have only taken a cursory look at the interior. From what I recall, it was a thick rubbery material. It seemed to be in fine condition and not showing any signs of a problem. Do you think the fiberglass is original? I have hull #256, so likely our boats should be nearly the same.

The torpedo tube on my boat is actually two tubes, joined amidships by a flexible rubber hose. My assumption is that hull flex would break a single tube, hence the rubber hose joint. The fiberglass certainly looks to be original. Unfortunately, I'm 900 miles from my boat and cat take a photo for you.
 
For the last month I have been watching and keeping track of the Vendee Globe racers. The conditions they are sailing in are amazing. Those guys are nuts! As I see the strain on those boats and the damage they have sustained, I can't help but think of the stresses our older boats are subject to. Even though we mostly don't sail under such horrible conditions as the round the world guys, we still sail hard and expect our boats to stand up to what we put then through. I think the important thing is to always be aware of points of potential problems, such as the torpedo tube. Captain John Bond of the Naval Academy once said at a Safety at Sea seminar, "You get what you inspect, not what you expect". Always sounded like good advice, especially as our boats age.

Jim
 
Back
Top